
Roads of the same road type can be connected by selecting the two markers that should connect (hold the Shift key when selecting the marker) and pressing the "Join Selected Roads" button in the Inspector or Shift + J. The two road objects will merge into one road object.
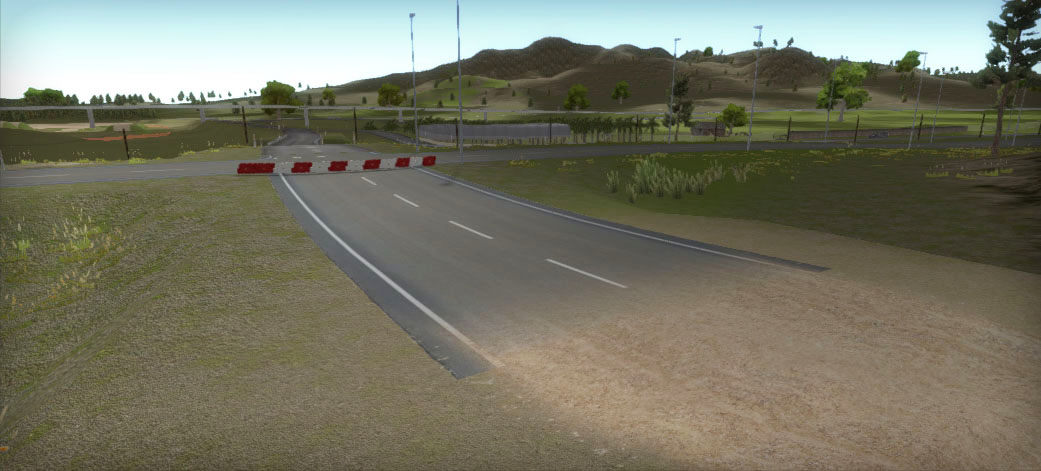
This will not work for different road types. The I Connector can be used in this case. It works similar as a crossing / connection prefab, it can be selected through the center yellow handle and on the sides there are two green connection handles to attach the roads. The default functionality is that it will simply connect the two roads. An example of thisin the demo scene is the Primary road type connecting to the RA road type, the residential area road type.
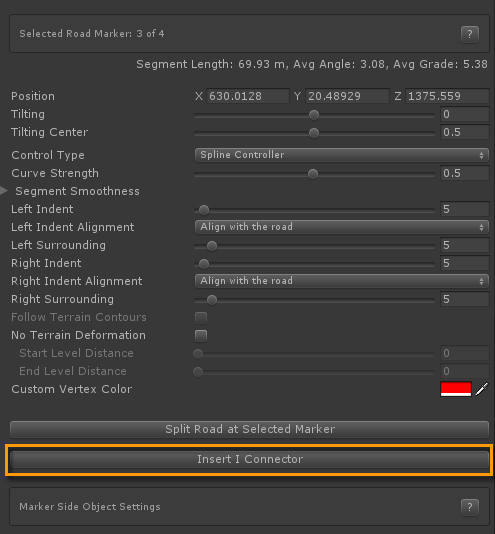
Because it is by default an empty object without a mesh you do not want to instantiate it directly in the scene. There for this connection type is not available in the crossings / connection tab. Instead you can find it near the end of the marker section in the Inspector just above the marker side object section, "Insert I Connector" button.
More advanced I Connector options are dicussed below.
Here we use the I Connector as a transition, the dirt track blends with the asphalt track. The following steps were taken:
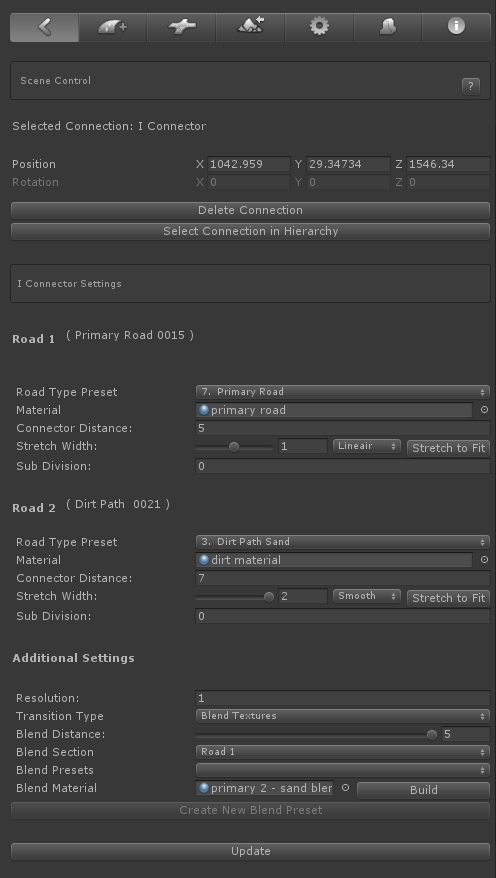
1. An I Connector was attached to the primary Road (Road 1 in the Inspector)
2. The dirt track was connected to the other end (Road 2 in the Inspector)
3. Road 1 > Connector Distance: 5. This will create geometry over 5 units over which the road type blending will take place.
4. Road 2 > Connector Distance 7: This is used to stretch the dirt path width to match the asphalt road. This is not really visible in the above screenshot, but in the demo scene you will see that the dirt track is significantly narrower then the asphalt track. The "Stretch to Fit" button will auto adjust the width. Since the Primary road is 8 units wide and the dirt track 4 units, the stretching is exactly 2 ( 2 * 4). We could have done this on road 1 but it is more logical that the width of the dirt path adjusts to the asphalt track instead of the other way around.
5. Because we want to blend the dirt texture with the asphalt texture, "Blend Textures" was selected from the Transition Type dropdown.
5. Next we created a new material "Primary - sand blend" using the shader "EasyRoads3D / ER Dual Road Blend". This material was dropped in the Blend Material slot. The shaders used on the road materials are set up using standard Unity texture property names "_MainTex", "_BumpMap", there for we can use the "Build" button in the Inspector next to the material slot to auto assign textures to the material based on the involved road types. The respective textures can of course also be assigned manually.
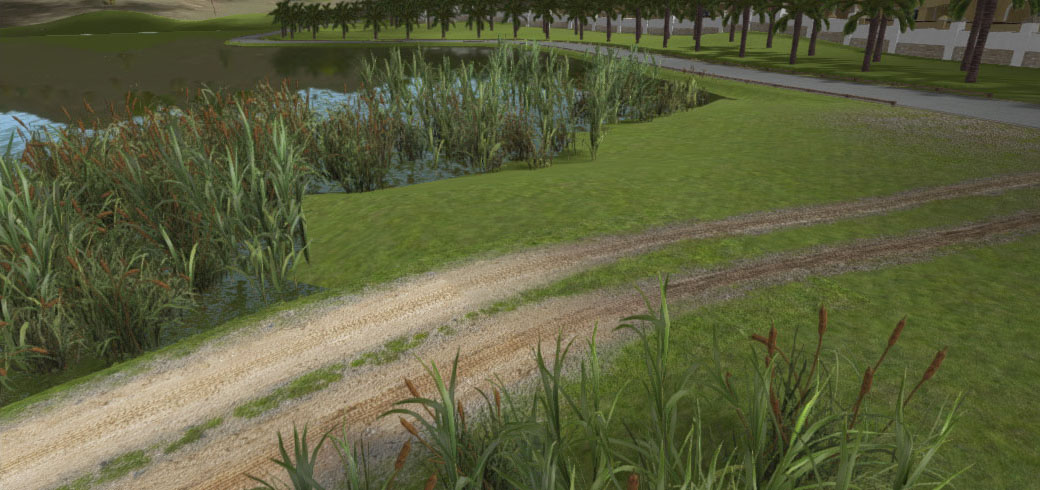
That's it, one could adjust the Blend Distance slider to fine tune the blending.
The "ER Dual Road Blend" shader currently acts as an example, it will be further improved with more options like a detail texture slot to blend the dirt texture stronger on the tire tracks and less strong outside the tire track.
This one is similar to the previous blend example but in this case we use a transition texture between the two road types..
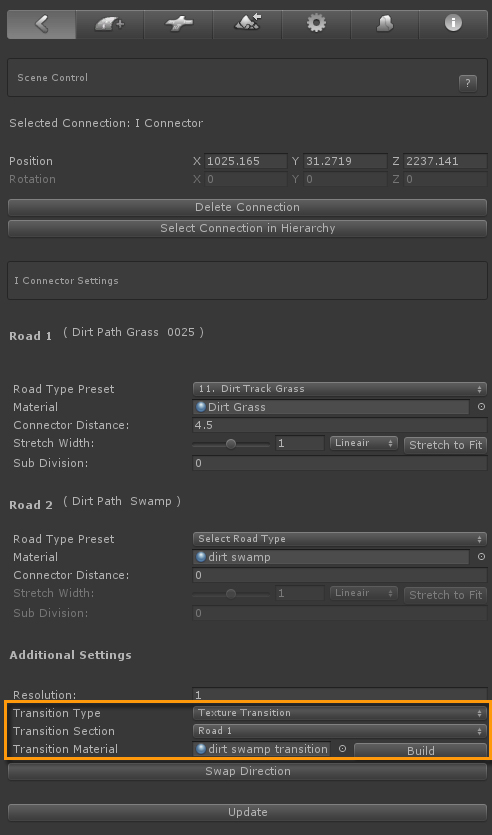
1. As the road width is 4.5 and the transition texture width / height ratio is 1:1, we set the Connector Distance also to 4.5. The connection length and width will match the square material texture.
2. This time "Texture Transition" is used for the Transition Type.
3. A new material "dirt swamp transition" was created, using the transition texture, and dropped in the Transition Material slot.
This transition type is for more distinctive road/path texture transitions that cannot be achieved by fading the two road textures.

